Rolling paper art is a niche that probably sounds more labor-intensive than it is. Most of the methods below take two to five minutes and produce something that looks genuinely intentional. Whether you're doing this because you enjoy the ritual, because you want to make something worth photographing, or because you're exploring what custom paper aesthetics look like before committing to a printed order, there are more options here than most people realize.
One important note before starting: any ink, paint, or adhesive that touches rolling paper needs to be either food-safe or at minimum non-toxic when burned. This matters. Standard ballpoint pen ink, acrylic paint, and most stamp inks contain compounds that produce harmful fumes when combusted. This guide notes safety status for each method.
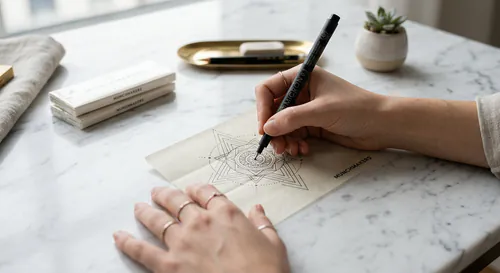
Fine-tip pen doodles
The most accessible method. You need a rolling paper (king size gives you the most surface area) and a food-safe pen. Look specifically for pens sold as "edible ink" or "food safe," typically designed for decorating cakes and pastries. The ink in these pens is FDA-approved for food contact and burns cleanly at smoking temperatures. Standard Sharpies, ballpoints, and drawing pens are not safe for this application regardless of what you may have read elsewhere.
With a food-safe pen, the paper becomes a small but viable drawing surface. Fine geometric patterns, dot work, simple lettering, plant outlines, and minimalist illustrations all translate well to the narrow aspect ratio of a king size paper. Work on a flat surface and let the ink dry for 30-60 seconds before rolling to avoid smearing.
Watercolor wash backgrounds
Thin watercolor applied to a rolling paper creates a colored or gradient background that shows through translucent rice papers especially beautifully. Use food-safe watercolors (several brands make them for cake decoration) diluted to a very thin wash. Apply with a soft brush in a single direction to avoid tearing the paper. Let dry completely before rolling -- five to ten minutes minimum. The result is a paper with a soft color field that makes whatever ink work you add on top read differently.
Thicker papers (hemp or standard wood pulp) handle watercolor slightly better than rice papers, which can pucker and distort if you apply too much water. Start with a very dilute wash and test on a paper you're willing to discard before doing this on your nicest rolling paper.
Stamp impressions
Rubber stamps with food-safe ink produce clean, repeatable patterns on rolling papers. Small geometric stamps, botanical stamps, and text stamps (especially small script stamps) work well on the compact surface. The key is food-safe stamp ink, which is available from specialty cake decorating suppliers. Regular stamp ink pads are not safe for this application.
One application per paper works better than overlapping stamps, which can cause the damp ink to tear the paper. Press the stamp firmly and lift cleanly rather than rocking it. Allow the ink to dry before rolling.
Washi tape borders
Washi tape is made from Japanese rice paper and plant-based adhesive. Most washi tape is technically food-safe in composition, though I'd suggest confirming with the manufacturer before burning it. Applied as a thin border along the non-glue edge of a rolling paper, it creates a colored or patterned frame that's visible from the outside of the finished roll. The tape needs to be thin enough that it doesn't significantly change the roll structure. 5mm washi tape applied carefully and rolled with the pattern facing outward is the typical execution.
Gold leaf accents
Edible gold leaf is exactly what it sounds like: genuine thin gold foil certified for food use. It's available from baking supply stores and several online retailers. Applied with a soft brush to a lightly water-dampened area of a rolling paper, it adheres and creates an actual metallic gold surface. The visual effect is genuinely impressive, particularly on a dark background if you've done a watercolor wash first.
Edible gold leaf burns almost completely cleanly at smoking temperatures (gold has a very high melting point and no toxic combustion products). This is one of the few premium finishing options that's genuinely safe and also genuinely looks expensive. The cost per paper is low because the sheets are thin and a small amount covers significant area on a rolling paper surface.
Nature-pressed designs
Small dried botanicals (pressed flowers, herbs, leaves) can be adhered to rolling papers with a small amount of gum arabic solution (the same plant-based adhesive used on the paper's own gum strip). This creates a paper with actual plant material on the surface. The aesthetic is organic and distinctive, the materials are natural, and gum arabic burns cleanly.
The mechanical challenge is keeping the botanical flat and thin enough that the paper still rolls without cracking. Very thin pressed flowers (pansy petals, small herb leaves) work better than anything with a raised midrib or stem. Press botanicals for at least a week between heavy books before applying.
Gradient highlighting with food-safe markers
Using two food-safe markers in compatible colors, blend from one end of the paper to the other with light cross-hatching to create a gradient. This takes some practice to get smooth but produces a professional-looking result when executed well. The technique is the same as basic marker blending: lay the lighter color first across the full paper, then add the darker color progressively from one end, blending while the ink is still slightly damp.
Branded logo printing at home
If you want a printed logo rather than hand-drawn work, some desktop inkjet printers can handle rolling paper sheets if you mount them carefully on standard paper (some people use a light strip of painter's tape along the non-glue edge to stabilize the rolling paper against a backing sheet). The ink is the critical variable: standard inkjet ink is not food-safe. Edible inkjet cartridge kits exist for the purpose of printing on edible wafer paper for cakes, and these work on rolling papers with the same principle. The print quality is good enough for logos and simple text but not photographic images.
This is genuinely a DIY stopgap, not a substitute for professionally custom-printed papers. The time investment for a single sheet is substantial when you factor in setup, testing, and drying. For anything beyond a few papers, having custom papers printed professionally makes more economic and time sense. Our custom printed rolling papers handle the branding work at scale, with food-safe inks, precise registration, and consistent results across every unit.
From DIY to professional custom
The art methods above are rewarding for personal use and for understanding what visual styles work on a rolling paper surface before you commit to a custom order. They're also genuinely fun as a creative practice. But the limitations are real: food-safe materials for DIY are harder to source than regular art supplies, the scale is one or a few papers at a time, and the consistency isn't there for anything you're giving to customers or distributing at scale.
If any of these art directions excite you from a brand perspective, that aesthetic translates to a custom paper order. The dispensary custom rolling papers guide covers the translation from creative concept to production spec. For a broader view of the DIY smoking accessory category, the DIY rolling tray ideas guide covers the table-level aesthetic that custom papers fit into.