DIY rolling tray ideas: 10 creative ways to make your own at home
Making your own rolling tray is one of those projects that sounds fancier than it is. Most of these ideas cost between $5 and $30, take an afternoon, and end up looking genuinely good on a shelf. Some of them look better than store-bought. I've tried a few of these myself, and I'll be honest about which ones are actually worth your time.
Here are 10 methods, ranked roughly by how practical they are for someone who doesn't have a workshop full of tools.
1. Picture frame with resin pour
This is probably the most popular DIY tray method, and for good reason. You grab a shallow picture frame with a glass front, flip it upside down so the glass faces up, mix a two-part epoxy resin, and pour it onto the glass surface. You can drop in pigment powder, dried flowers, glitter, or anything flat before the resin cures.
Difficulty: Medium. The tray itself is easy to make. Getting bubble-free, level resin takes practice.
Estimated cost: $15 to $25 (frame, resin kit, pigment)
Curing time: 24 to 48 hours depending on the resin brand.
The result is a completely smooth, glossy surface that's easy to clean. Herb doesn't get stuck in seams. If you use a deep-set frame, you get natural raised edges that keep things contained.
2. Painted wooden tray
Buy a plain wooden serving tray from a craft store or thrift shop, sand it lightly, and paint it however you want. Chalk paint gives a matte finish that photographs beautifully. Acrylic with a glossy varnish on top is more durable and easier to wipe down.
Difficulty: Easy.
Estimated cost: $5 to $15
The main limitation here is that unfinished wood absorbs moisture. You need at least two coats of varnish or polyurethane on the rolling surface, otherwise it stains and gets sticky over time.
3. Tile mosaic tray
Take a flat wooden base (a cheap cutting board works), apply tile adhesive, and press in small ceramic or glass mosaic tiles. Grout when dry. This takes more time than the other methods but the result is genuinely one of a kind.
Difficulty: Medium to hard, mostly because of the grouting step.
Estimated cost: $20 to $35
One warning: grout lines can collect resin and debris over time. Use an epoxy grout rather than standard cement grout, and seal it well after it cures.
4. Vinyl decal on bamboo
This is the fastest method on the list. Buy a plain bamboo tray (they're cheap and widely available), cut a vinyl decal on a Cricut or order a pre-cut one online, and apply it to the surface. Seal with a water-based varnish so the decal edges don't peel.
Difficulty: Very easy.
Estimated cost: $8 to $20
You won't get the durability of a printed tray, but for a bedroom setup or desk use it holds up fine. Bamboo is naturally hard and wipes clean easily, which helps.
5. Skateboard deck repurpose
Old skateboard decks are essentially ready-made trays. They're concave, which keeps everything centered. The graphics on the underside look great as a display surface if you mount it right-side-up. You don't need to do anything to the deck itself except clean it and optionally sand down the grip tape on the rolling surface.
Difficulty: Easy if you already have a deck. Finding one cheaply is the main task.
Estimated cost: $0 to $15 depending on whether you have an old deck lying around
The concave shape is the best accidental feature here. Herb stays in the center naturally and doesn't roll to the edges.
6. Serving tray conversion
Decorative serving trays from HomeGoods, TJ Maxx, or thrift stores already have raised edges, a stable base, and usually a nice finish. Many are painted metal or lacquered wood. You're not building anything, just repurposing.
Difficulty: Easy. You're just cleaning it.
Estimated cost: $3 to $10 at a thrift store
This is my honest recommendation if you want a good tray fast with no crafting involved. A well-made serving tray is often higher quality than anything sold specifically as a "rolling tray" in the $15 to $30 price range.
7. Acrylic pour painting on canvas board
Acrylic pour painting on a primed canvas board or MDF creates swirling marble-like patterns that are genuinely hard to replicate. Pour a mix of fluid acrylic colors diluted with pouring medium onto the surface, tilt it around to create patterns, then let it cure flat.
Difficulty: Medium (the technique is easy but the results are unpredictable).
Estimated cost: $10 to $20
Seal with a high-gloss resin pour on top after the paint cures for a smooth, functional surface. Without the resin coat, the dried acrylic is too textured for rolling.
8. Epoxy geode design
Similar to the resin pour method, but you're recreating the look of a geode slice. Arrange colored crushed glass, quartz crystals, or metallic powders in organic curved lines before pouring epoxy over the top. The effect, when it works, is genuinely stunning.
Difficulty: Medium to hard. Getting the geode shape to look intentional rather than random takes a few tries.
Estimated cost: $25 to $45
Worth it if you want something that looks like art. Not worth it if you just want something functional to roll on.
9. Resin with dried flowers
Press and dry flowers completely (at least two weeks in a book or a few days in a flower press), then embed them in a clear resin pour over a wooden or glass base. The flowers need to be fully dry or they'll rot under the resin and turn brown.
Difficulty: Easy once you have dry flowers.
Estimated cost: $15 to $25
Lavender, chamomile, and small wildflowers work best because they're flat and press well. Roses and thick petals look great in the press but rarely come out clean under resin.
10. Hand-painted ceramic tile
Buy a large ceramic tile (a 12x8 inch floor tile from a hardware store costs around $2), paint it with ceramic-compatible acrylic paint, and seal with a food-safe ceramic glaze. Tiles are naturally flat, smooth, heat-resistant, and easy to clean.
Difficulty: Easy, though you need to cure the glaze in an oven at around 350°F for 30 minutes.
Estimated cost: $5 to $10
The main downside is weight. Ceramic tiles are heavy and not particularly travel-friendly. For a home setup, though, the surface is excellent.
When DIY makes sense and when it doesn't
If you want a tray that looks personal and you enjoy making things, several of these will genuinely satisfy. The picture frame resin method and the geode tray can look better than commercial options. The vinyl-on-bamboo method takes 20 minutes and costs less than a coffee.
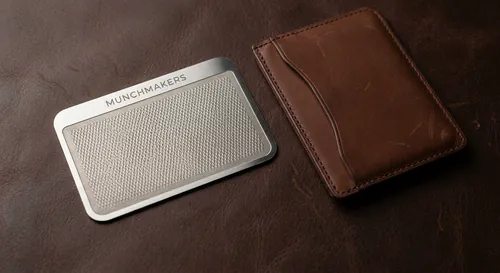
Where DIY falls short is consistency and durability at scale. If you want a tray with your logo, a specific pantone color, or a design that's printed evenly across 50 trays, homemade methods aren't the right approach. That's when a custom-printed tray from a real manufacturer makes more sense than anything you'd put together on your kitchen table. Our custom rolling trays can be printed to exact specs, including branded designs for shops and dispensaries, with a rolling tray with magnetic lid option if you want the contained setup that most DIY methods can't replicate.
But for a personal tray, you can do a lot with a picture frame, some resin, and an afternoon. Start there.
For more design ideas before you commit to a method, see our post on rolling tray design ideas and inspiration. If you're building out a full setup around your tray, the custom rolling tray ultimate guide covers the full picture.