How to roll a cone: step-by-step guide for beginners who can't roll a straight joint
If you've ever tried to roll a straight joint and ended up with something that burns crooked, falls apart after two hits, or just looks embarrassing, cones are your answer. I've watched dozens of people struggle through the flat-joint method when cones were sitting right there as the obvious fix. The cone shape is actually more forgiving to roll, and once you understand why the shape works the way it does, everything clicks.
This guide walks through the full process from paper to lit. We'll cover why the shape matters, what makes a cone hit differently, and how to troubleshoot the most common problems.
Why the cone shape works better
A straight joint has the same diameter tip to tail. The problem is that the tip is where you're pulling air through, and if it's packed as tightly as the rest, airflow suffers. Cones solve this by narrowing toward the filter end where you draw, while widening at the fill end where the herb sits. You get better airflow, a more consistent burn, and less paper relative to herb at the business end.
There's also the packing advantage. Because the wide end is open, you can fill the cone after you've shaped it rather than trying to roll herb inside paper simultaneously. That's the part that trips people up with straight joints. Cones let you separate the two steps: shape first, fill second.
The burn is more even too. The taper means the joint is always narrowing as it burns down toward the filter, so you don't get the fat wet end effect where the last third of a straight joint becomes a soggy mess.
Cone papers vs straight rolling papers
You can roll a cone with any rolling papers, but some papers make it easier. Standard 1¼ papers work fine for a small cone. King-size papers give you more room to build the taper. The shape comes from how you hold and roll the paper, not from the paper itself.
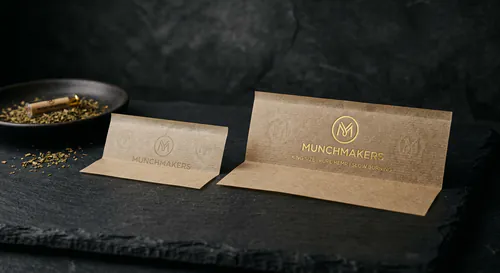
Pre-formed cone papers exist and they're worth knowing about. These come with the shape already pressed in and a glue strip ready to go. They're faster to use but more expensive per unit. For learning the technique, stick to flat papers so you actually develop the skill.
Thinner papers are harder to manage when you're learning to cone. Rice papers are beautiful but they're slippery and unforgiving. Hemp papers have a little more texture and grip. For beginners, a medium-weight hemp paper is the right call.
What you'll need
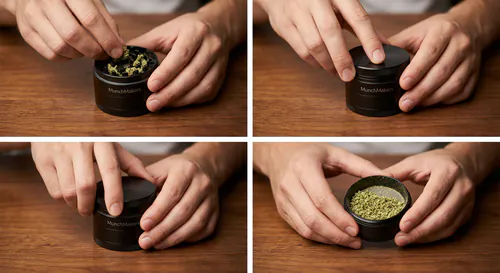
You need rolling papers, filter tips, ground herb, and something thin to pack with (a pen, a pencil, a chopstick). A grinder is important here because cone packing works best with an even, medium grind. Too coarse and the cone won't pack tightly enough. Too fine and it clogs.
A flat surface helps, though experienced rollers do this in their hands.
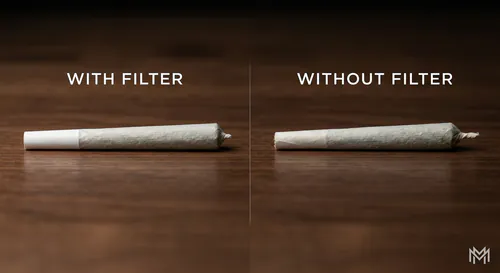
Step 1: make the filter
The filter, or crutch, is the foundation of the cone. It determines the diameter of the narrow end and gives you something structural to roll around. Take a filter tip and fold it accordion style three times, then roll the remaining strip around that folded section. The result is a cylinder with a zigzag core. This structure prevents you from inhaling herb while still allowing airflow.
For a cone, the filter should be fairly tight. A loose filter creates a wider base that's hard to seal properly. Make the crutch, then hold it between your thumb and first finger with about a third of it exposed above your fingers. That exposed section is where the paper will wrap.
Step 2: shape the paper into a cone
Hold the filter in your non-dominant hand. Place the paper in landscape orientation with the glue strip away from you at the top. The bottom edge of the paper should sit along the bottom edge of your filter.
Here's the move that most tutorials skip: angle the paper. Instead of holding the paper square to the filter, tilt the far end of the paper upward so the bottom edge of the paper runs diagonally. The filter sits at the low end of that diagonal. This angle is what creates the cone. As you roll, the paper naturally forms a wider circumference at the far end because more paper is available there.
Start rolling the filter end tightly, tucking the bottom edge of the paper under the filter and working it into a tight cylinder. As you move your fingers toward the far end, let the paper widen out. You're essentially rolling a funnel shape. The far end of the cone should have noticeably more paper than the filter end.
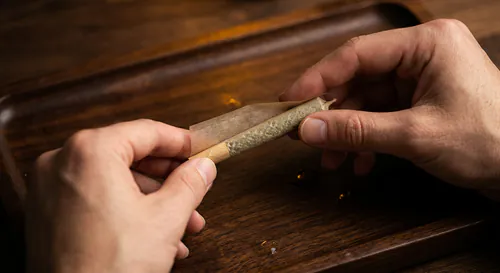
Step 3: lick and seal
Once you've worked the paper into a cone shape, roll until you can see the glue strip. Lick lightly and press down, working from the filter end toward the tip. Don't over-wet the glue strip. One pass is enough. Press and hold for a couple of seconds.
You should now have an empty cone shape with the filter at one end and an open funnel at the other.
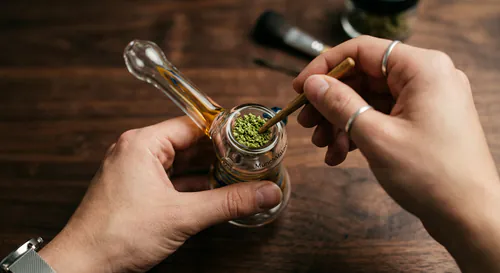
Step 4: fill the cone
Hold the cone filter-down, wide end up. Funnel your ground herb in. I usually use a folded piece of paper as a makeshift chute. After you've added some herb, use your packing tool (pen, chopstick, whatever) to tamp it down gently. You're not trying to compress it into a dense brick. You want it settled, not packed tight.
Add more herb, tamp again. Repeat until the cone is filled to about 3-4mm below the rim of the open end. Leave that space for the twist.
Step 5: twist the tip
Pinch the excess paper at the top between your thumb and finger and twirl the cone in one direction. The paper at the tip will twist closed. Once twisted, give the tip a small bend to keep it from unraveling.
Some people leave the twist long. I prefer to give it a little pull to make the twisted end compact so it lights easier.
Troubleshooting common problems
Loose cones that fall apart come from either a bad seal at the glue strip or filling too aggressively before the seal is fully dry. If yours are coming loose, roll more slowly and let the seal set before filling.
Lopsided cones come from not maintaining the diagonal angle of the paper while you roll. If one side is tighter than the other, you've let the paper go square. It takes a few attempts to internalize the angle but once you feel it, it's automatic.
Cones that canoe (one side burns faster than the other) are almost always a packing issue. If one side is denser than the other, the loose side burns ahead. Pack in a circular pattern and tamp evenly.
Cones that are too tight to draw through happen when the grind is too fine or the herb is packed too densely. Medium grind, gentle tamping.
Hand-rolled cones vs pre-rolled cones
Pre-rolled cones are the tube-and-cardboard-filter cones you buy at a smoke shop. You just fill and twist. They're faster, more consistent, and great for travel. But they're also not cheap if you're going through a lot of them, and there's something to be said for the control you get when you roll your own. The paper gauge, the filter size, the taper angle -- you decide all of that when you roll by hand.
Pre-rolled cones are the right answer when you're in a hurry or when you want to hand someone something that looks professional. Hand-rolled cones are the right answer when you actually want to roll something. Both are legitimate.
Learning to hand-roll a cone takes maybe four or five attempts before it starts feeling natural. After ten you'll be doing it while talking. The diagonal paper angle is the only non-obvious step. Everything else is just muscle memory.