Why Make Your Own Rolling Tray?
Look, I get it. You can grab a rolling tray at any smoke shop for a few bucks. But here's the thing - when you design your own, you're creating something that's actually yours. It's like the difference between a mass-produced poster and your favorite piece of art.
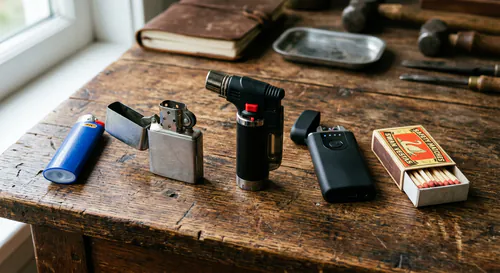
Rolling trays are pretty straightforward - they give you a clean, organized space to roll joints, pack bowls, and keep your grinder, papers, and lighter from wandering off. The raised edges catch everything, so you're not sweeping herb off your coffee table. But a DIY rolling tray? That's where it gets interesting. For more insights, check out our article on Bamboo Rolling Trays Wholesale: Eco-Friendly B2B Guide.
When you make your own, you get to pick exactly what it looks like. Want neon colors? Go for it. Prefer something minimalist? That works too. Plus, when friends come over and see your custom tray, it becomes a conversation piece. It's way more interesting than "yeah, I bought this at the shop."
And honestly, making one is just fun. You don't need to be some crafting genius - anyone can do this. Whether you're working with wood, metal, or even upcycling random stuff from around your house, it's a hands-on project that feels good to complete.

What You'll Need to Get Started
Before you dive in, let's talk materials. You'll need a base - wood, acrylic, or metal all work great. Wood gives you that natural vibe and it's easy to work with. Acrylic looks sleek and modern. Metal is super durable but might need a jigsaw to cut.
You'll also want:
- Sandpaper (a couple different grits - start rough, finish smooth)
- Paint or stain (pick colors that make you happy)
- Brushes that match your paint type
- Design stuff - stencils, decals, resin, whatever speaks to you
- A good sealer to protect everything when you're done
- Epoxy resin and hardener if you're going for that glossy finish
- Clear plastic cups for mixing (especially handy with resin)
- Spray paint if you're starting with a metal base
Hit up your local craft store or browse online. Just don't cheap out too much - you want materials that'll last through regular use.
Step 1: Size It Up and Cut It Out
First things first - figure out how big you want your tray. Think about what you're rolling and how much space you need for your grinder, papers, and other stuff. Too small and you'll be frustrated. Too big and it's awkward to move around.
Measure carefully and mark your dimensions on your material. Then grab your saw - a miter saw or circular saw for wood, a jigsaw or hacksaw for acrylic or metal - and cut along those lines. Take your time here. A wobbly cut means more sanding later.
And hey, safety first. Wear goggles and gloves. Nobody wants to explain a workshop injury.
Step 2: Sand Until It's Smooth
Now that you've got your shape cut out, it's sanding time. This step might seem boring, but trust me - it matters. Start with coarse-grit sandpaper to knock off any rough edges or splinters. Sand in circles with even pressure.
Once the rough stuff is gone, switch to finer-grit sandpaper. If you're working with wood, follow the grain. For other materials, just keep it smooth and consistent. When you're done, wipe everything down with a clean cloth to get rid of the dust.
Your tray should feel smooth to the touch. That's how you know you're ready for the fun part.
Step 3: Get Creative With Your Design
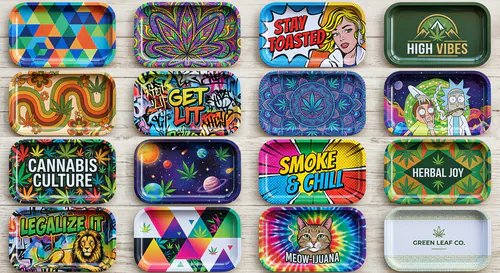
Here's where your personality comes in. What kind of vibe are you going for? Think about colors, patterns, and images that you're drawn to. Your tray should reflect you.
Not feeling artistic? No problem. Stencils and decals are your friends. You can find tons of options online or at craft stores. Just pick something you like and apply it - instant cool factor.
Feel like experimenting? Try different techniques. Paint something freehand. Use decoupage with magazine cutouts or fabric. Mix glitter into epoxy for a sparkly finish. Create a resin tray with a silicone mold for unique shapes.
Want to make it meaningful? Add a favorite quote, a symbol that matters to you, or even inside jokes with your friends. The possibilities are endless.
For inspiration, scroll through Pinterest or Instagram. Search "custom rolling trays" or "DIY smoking accessories" and you'll find hundreds of ideas. Save the ones that speak to you and put your own spin on them. For more insights, check out our article on Custom Rolling Tray Design Guide: DIY vs Professional Custom....
Step 4: Apply Your Design
Time to bring your vision to life. Depending on what look you're going for, you've got options:
Stenciling
Perfect for crisp, clean designs. Tape your stencil down so it doesn't shift. Dab paint on with a sponge or brush - use a little at a time to avoid bleeding under the edges. Once it's dry, peel off the stencil and boom - professional-looking results.
Painting
Go freehand or create abstract patterns. Use different brush sizes for different effects. Mix colors to create custom shades. Don't overthink it - just let your creativity flow. Got a heat gun? It'll speed up drying time between coats.
Decoupage
Cut out designs from paper, fabric, or even photos. Brush a thin layer of decoupage glue onto your tray, place your design, and smooth out any bubbles. Once it's dry, apply several more coats of glue over the top for protection. Let each coat dry before adding the next.
Each technique has its perks. Pick the one that matches your skill level and desired outcome. And don't be afraid to mix and match - some of the coolest trays use multiple techniques.
Step 5: Seal the Deal
Your design looks amazing, right? Now let's protect it. A good sealer keeps your tray looking fresh through spills, scratches, and general wear and tear. It also makes cleanup way easier.
Choose a sealer that matches your materials. Used acrylic paint? Go with clear acrylic sealer. Did decoupage? Use decoupage sealer. Follow the instructions on the bottle, and make sure you cover the entire surface, including the edges.
Let it dry completely before you use your tray. I know you're excited, but patience pays off here. A fully cured sealer means your tray will last for years.
Cool Ideas to Try
Need some inspiration? Here are some fun directions you could take:
- Glow-in-the-Dark Tray: Mix glow paint or resin into your design. Perfect for late-night sessions.
- Carved Wood Design: If you're handy with carving tools, etch patterns or initials into a wooden base.
- Resin with Embedded Objects: Drop small items like beads, glitter, or pressed flowers into clear resin for a one-of-a-kind look.
- Photo Tray: Print a favorite photo and seal it in resin or epoxy. Great for memories or meaningful places.
- Glowing Edges: Paint just the edges with glow-in-the-dark paint for a subtle but striking effect.
Make It Last
Want your tray to hold up over time? Here's how:
- Start with durable materials like wood or metal
- Use a protective coating like varnish or polyurethane
- Skip harsh chemicals when cleaning - stick to mild soap and water
- Clean it regularly so resin and debris don't build up
- Store it somewhere dry and cool when you're not using it
Think Outside the Box
You don't have to start from scratch. Got an old cookie tray? Paint it and add some designs. Find a vintage tray at a thrift store? Give it new life with fresh artwork. Old wooden boxes make great rolling trays too - especially if they have compartments for storage.
Ceramic tiles can create a modern, sleek base. Feeling adventurous? Heat up an old vinyl record and shape it into a tray (just do your research first - it takes some skill).
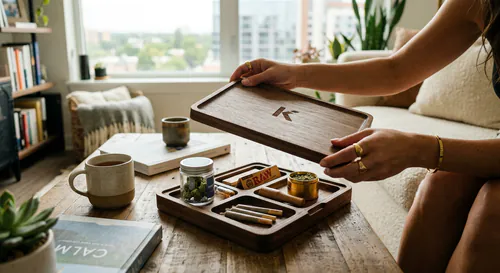
You can also personalize your tray with accessories. Add hooks for your lighter, magnets to hold papers, or small compartments for filters and tips. Make it functional and unique.
More Than Just Rolling
Once you've got your custom tray, you might realize it's useful for more than just rolling. People use theirs as desk organizers, craft supply holders, jewelry trays, mini planters, or even gift boxes. It's a versatile piece.
Fixing Common Issues
Run into problems? Here's how to handle them:
- Sticky surface: Clean with mild soap. Still sticky? Add a non-stick coating.
- Resin buildup: Regular cleaning helps. For tough spots, use a resin remover.
- Cracks or breaks: Fix with glue or epoxy. If it's really damaged, might be time for a new one.
- Bad smells: Clean with soap and water. If it persists, use a disinfectant.
- Hard to clean: Use a soft brush or a cleaner designed for rolling trays.
Getting the Most Out of Your Tray
Now that you've made this awesome tray, here's how to use it like a pro:
- Keep it clean - wipe it down after each use
- Organize your stuff using the different sections or edges
- Use a rolling mat if you're still getting the hang of rolling
- Try different rolling techniques to find what works for you
- Most importantly - enjoy the process and the ritual

Wrapping It Up
Making your own rolling tray is honestly one of those projects that's more fun than you'd expect. You end up with something that's completely yours - not just another generic piece of smoking gear.
Whether you go simple or elaborate, the result is something you'll actually want to use and show off. It becomes part of your routine, part of your space, part of your vibe.
So grab some materials, put on some music, and get creative. You've got this. And when you're done, you'll have a rolling tray that's unlike anyone else's - which is exactly the point.
If you're looking for more custom cannabis accessories, check out MunchMakers' full collection of grinders, lighters, papers, and more. Everything can be customized to match your style.